Connect new system
- Create new target system
- Edit target system
- Setup connection properties
- Set read mappings
- Set write mappings
- Activate system
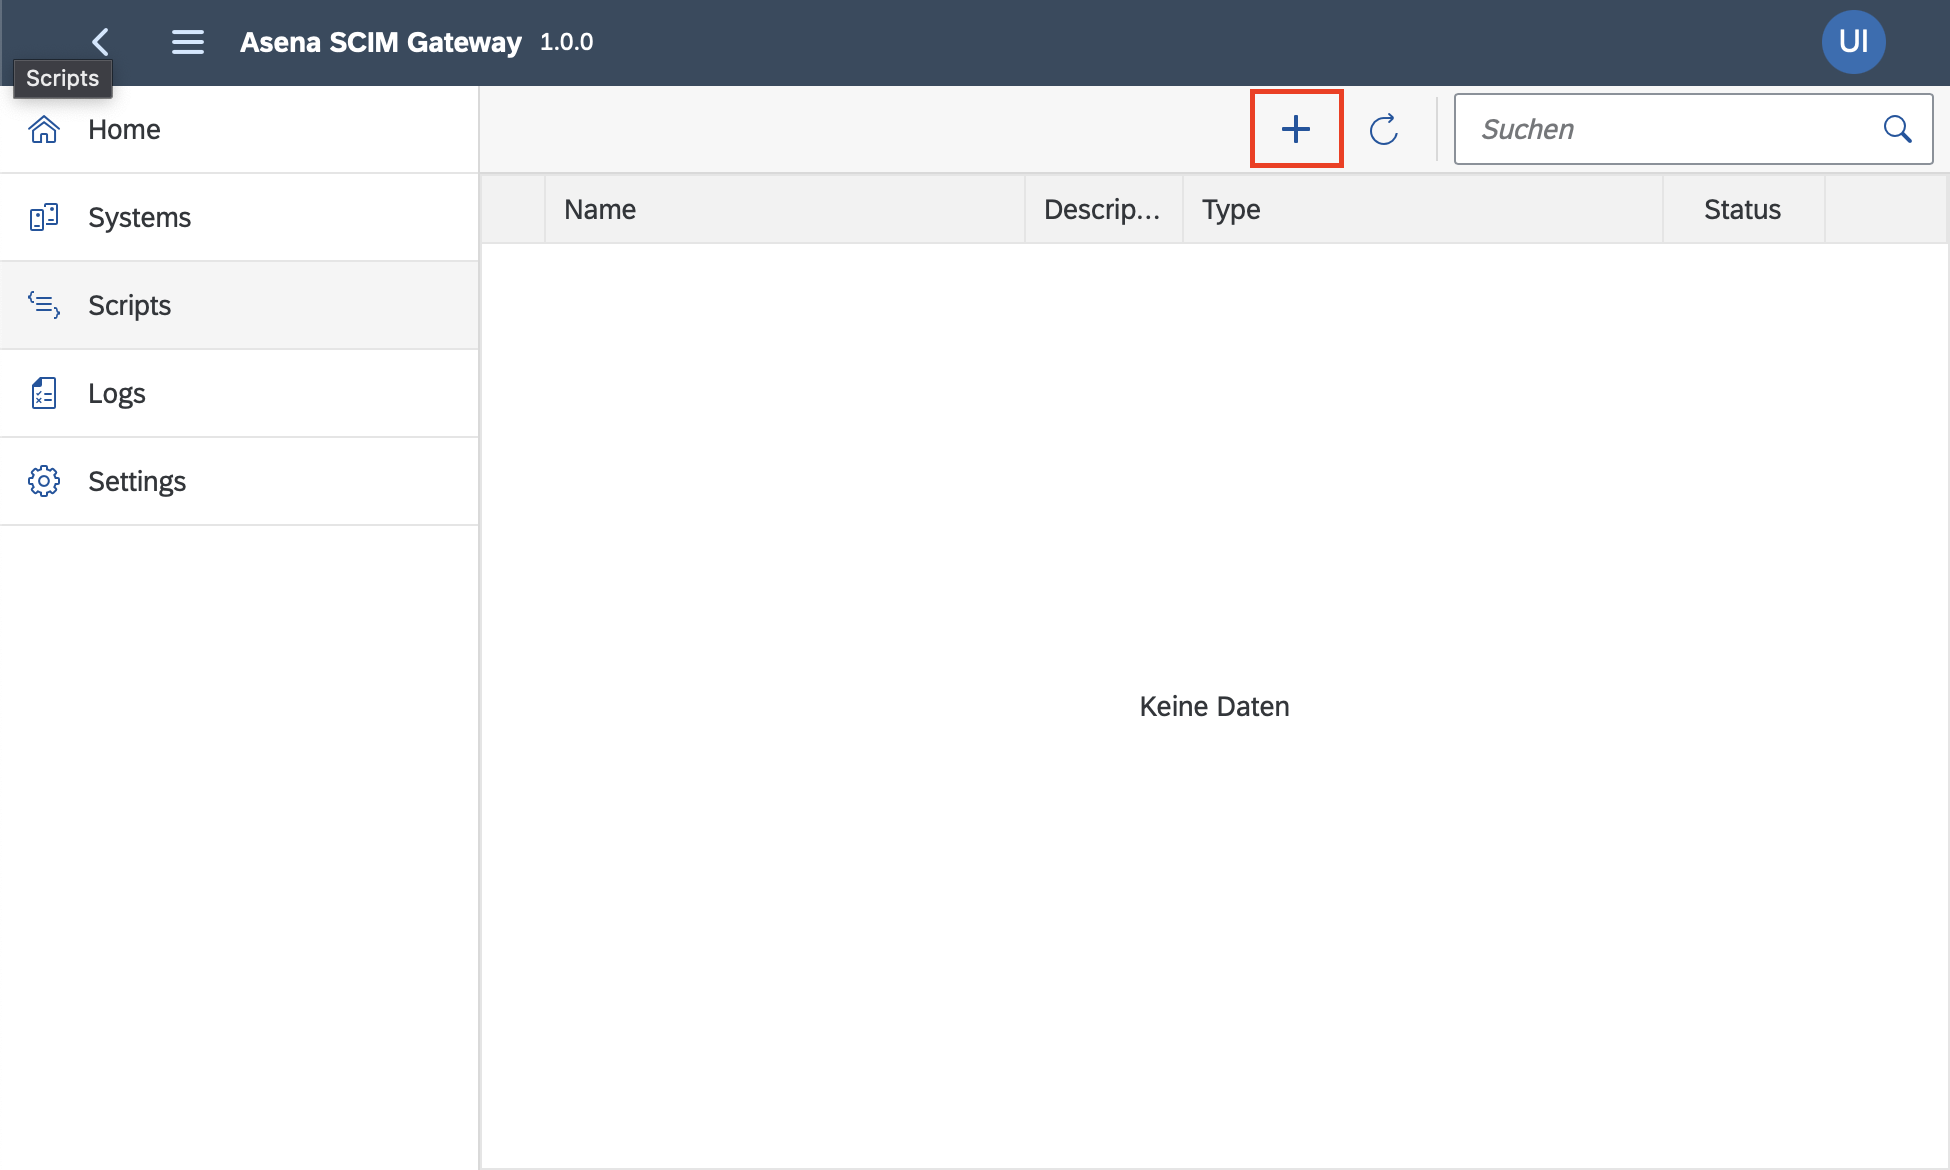
- Navigate to Systems and click on Add System icon:
- Fill in the following information:
- Select a system type
- Provide a name (must be unique)
- Provide a description of the system (optional)
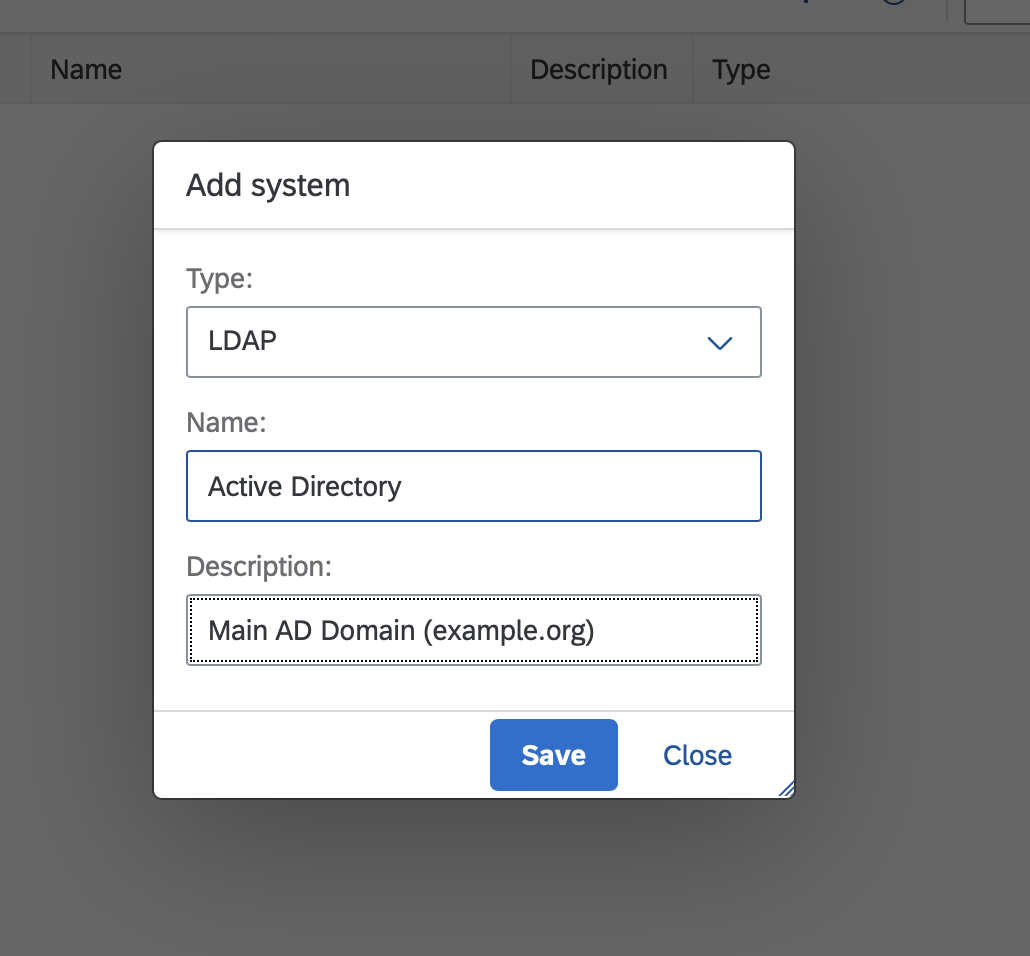
- Save.
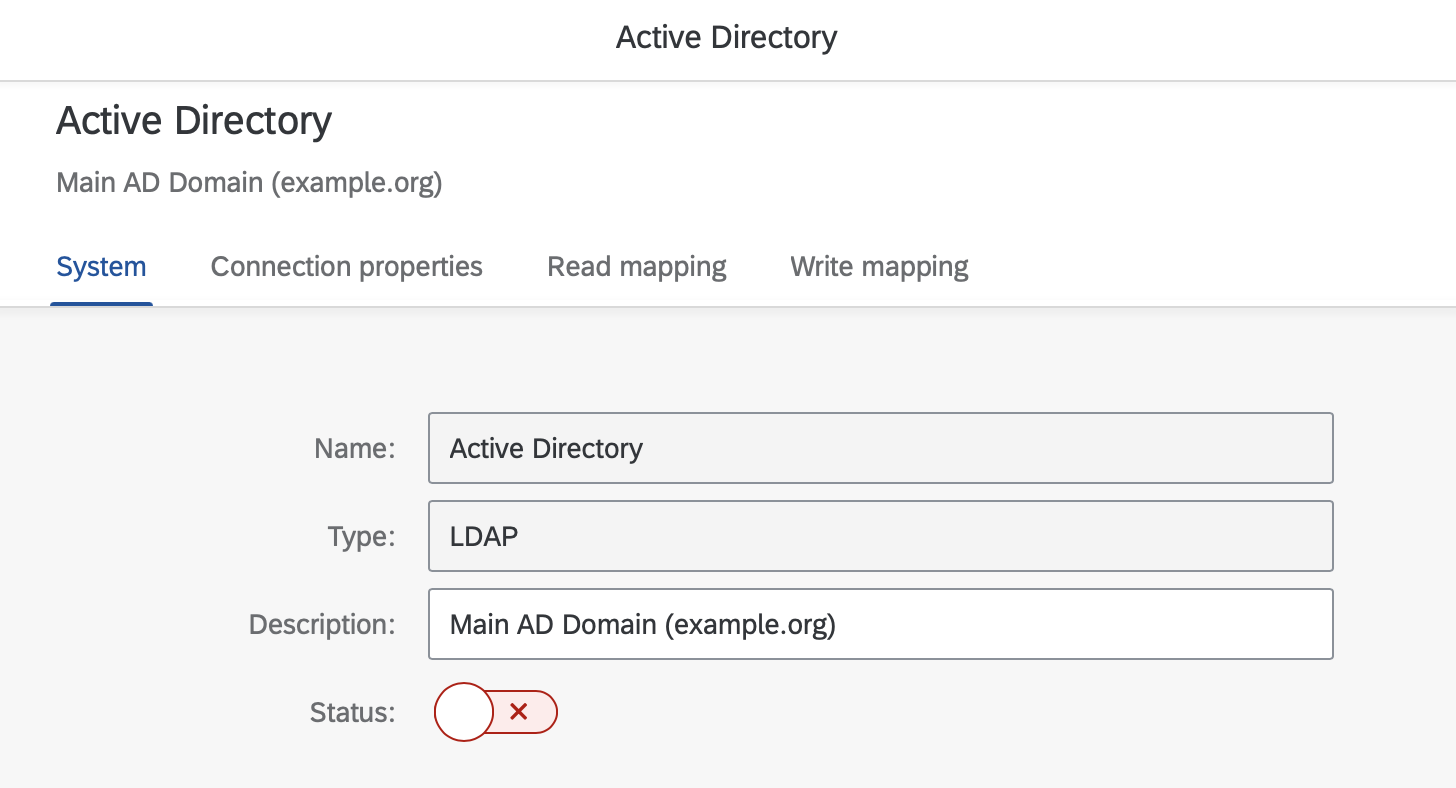
- Navigate to Systems and click on the Edit System icon:

- You can edit the description and activate/deactivate the target system:
Depending on the target system type, you will need to set properties like connection details or communication user details. Asena will provide you a standard set of properties. A detailed documentation about the specific properties can be found on the connectors wiki page.
-
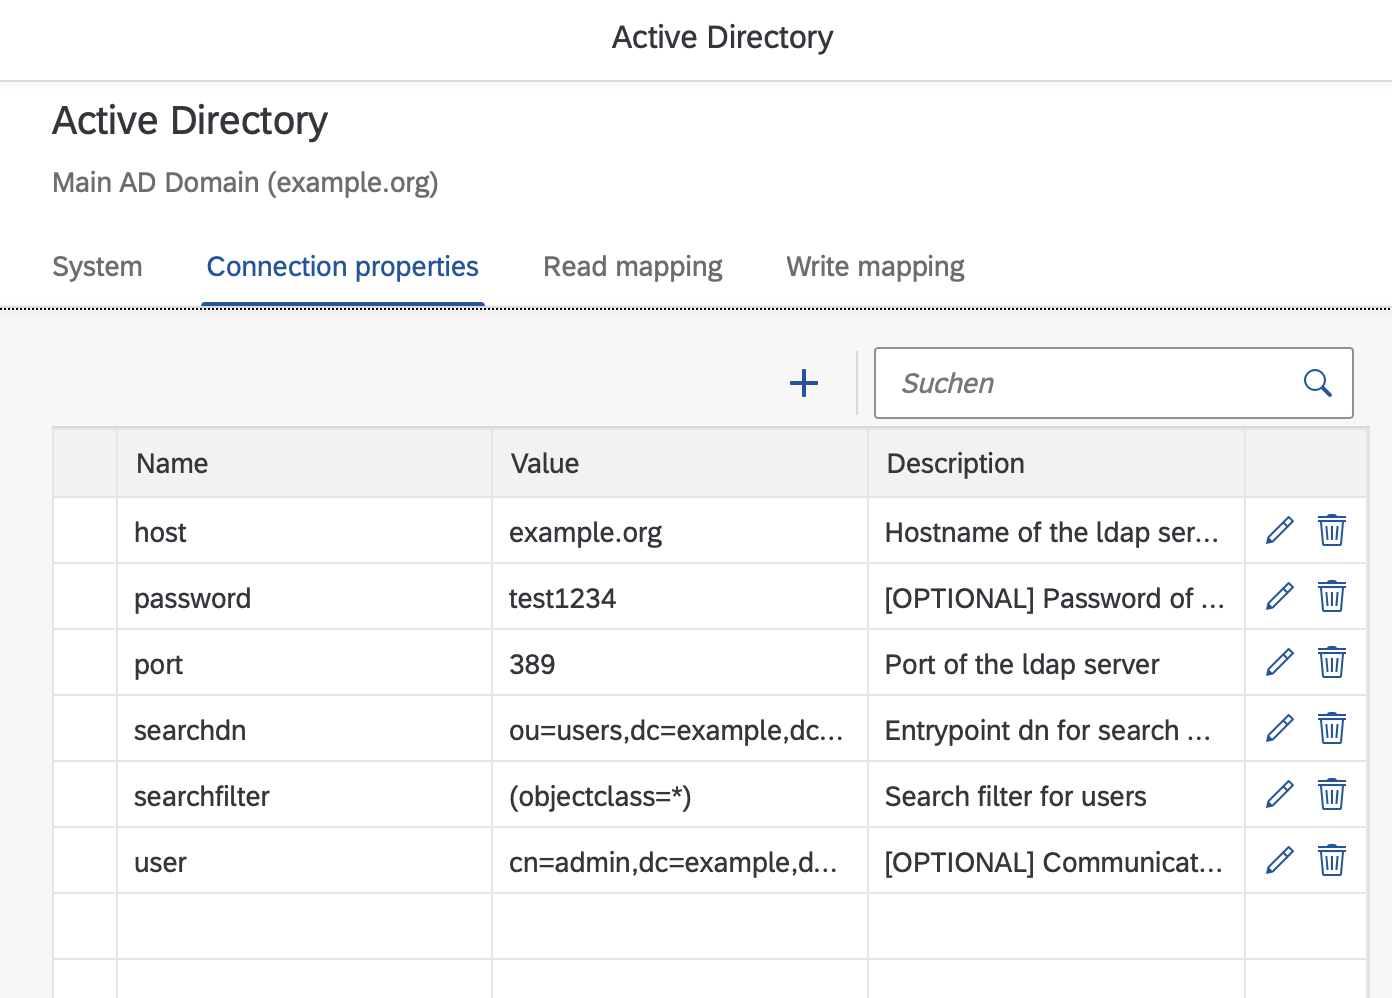
Open the target system overview like described in the last step and choose Connection properties:
-
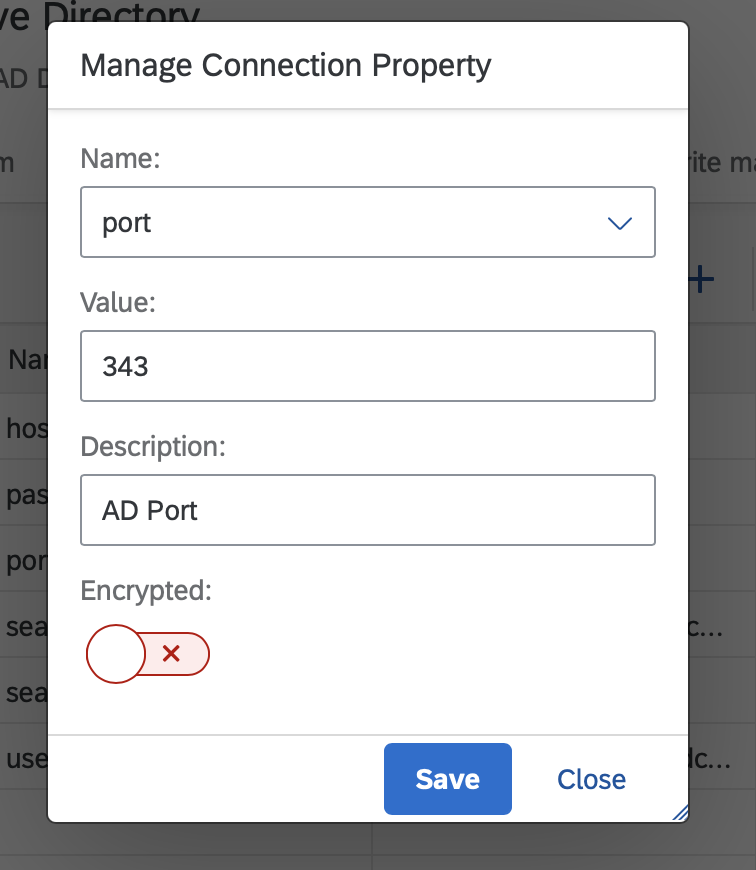
You can edit/add/delete a connection property clicking on the plus/penicl/bin icon.
-
In the following dialog you can customize the connection parameter:
For reading entities from remote systems you will need to provide a mapping of the target system attributes to the SCIM schema. Asena will provide you a set of pre-set mappings depending on the selected system type. You can customize the attributes to your needs. Setting a transformation in the read mapping take the attribute of the target system and execute the transformation on it before mapping it to the SCIM attribute. This step is explained here.
-
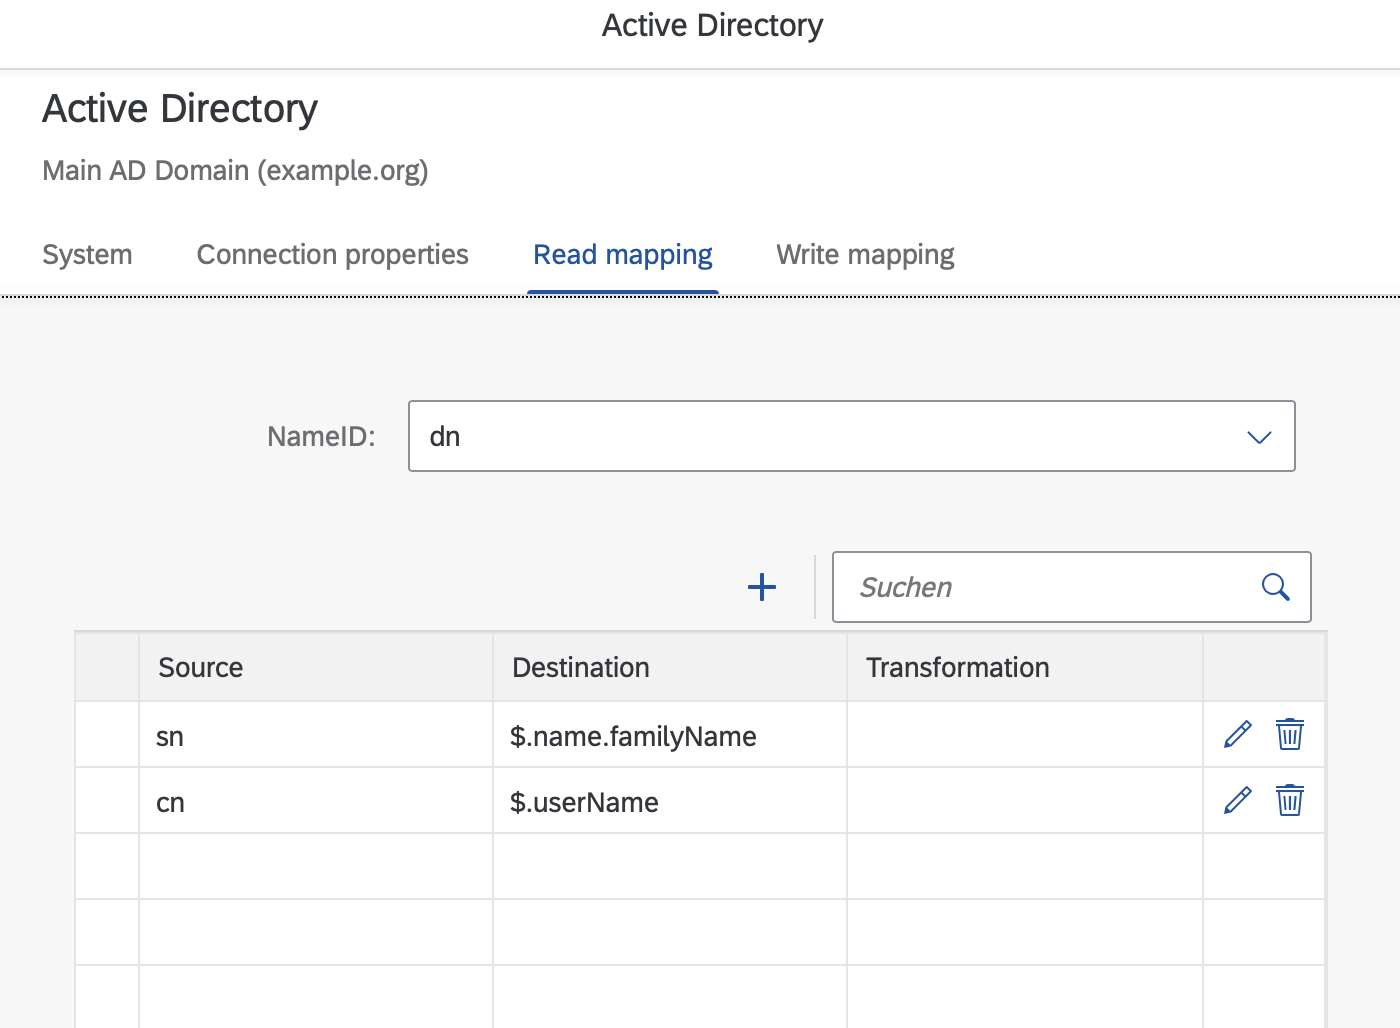
Open the target system overview and choose Read mappings:
-
Either create a new mapping (plus icon), edit an existing mapping (pencil icon) or delete one (bin icon).
-
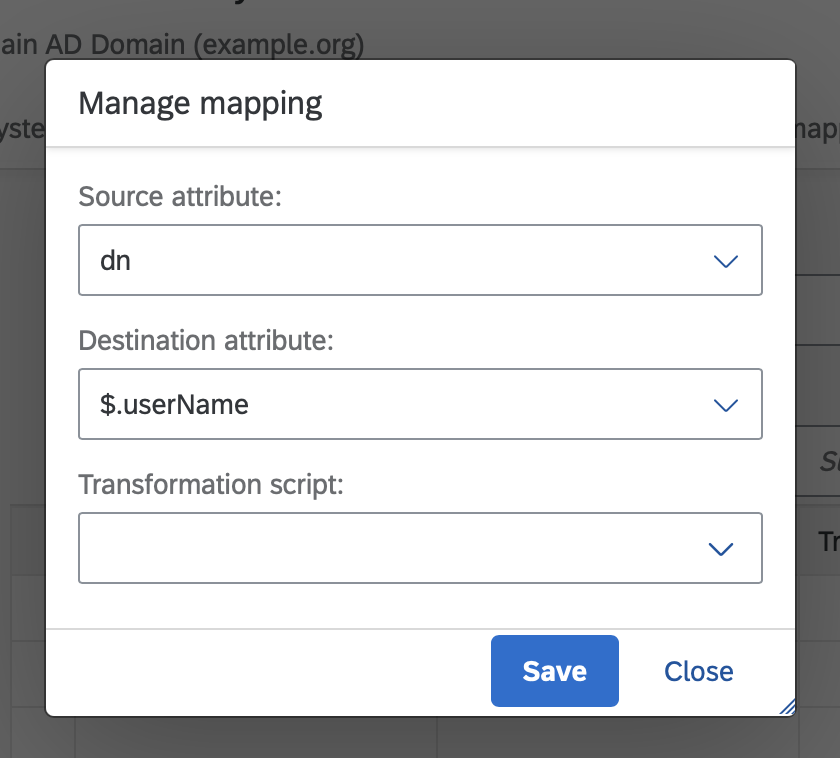
On creation or on edit the following fields can be set:
- Source attribute is the attribute of the target system. Asena will provide you a set of attributes, but you can extend it depending on the functionality of the connector.
- Destination attribute is the SCIM attribute to whom the source attribute will be mapped into.
- Transformation script can be used to modify the source attribute before being mapped.
- Save.
When writing entities to a target system you will need to provide a mapping of the SCIM attributes to the target system attributes. Asena will provide you a set of pre-set mappings. You can customize the attributes to your needs. Setting a transformation in the write mapping will take the SCIM attribute and execute the transformation before mapping it to the remote system attribute. This step is explained here.
-
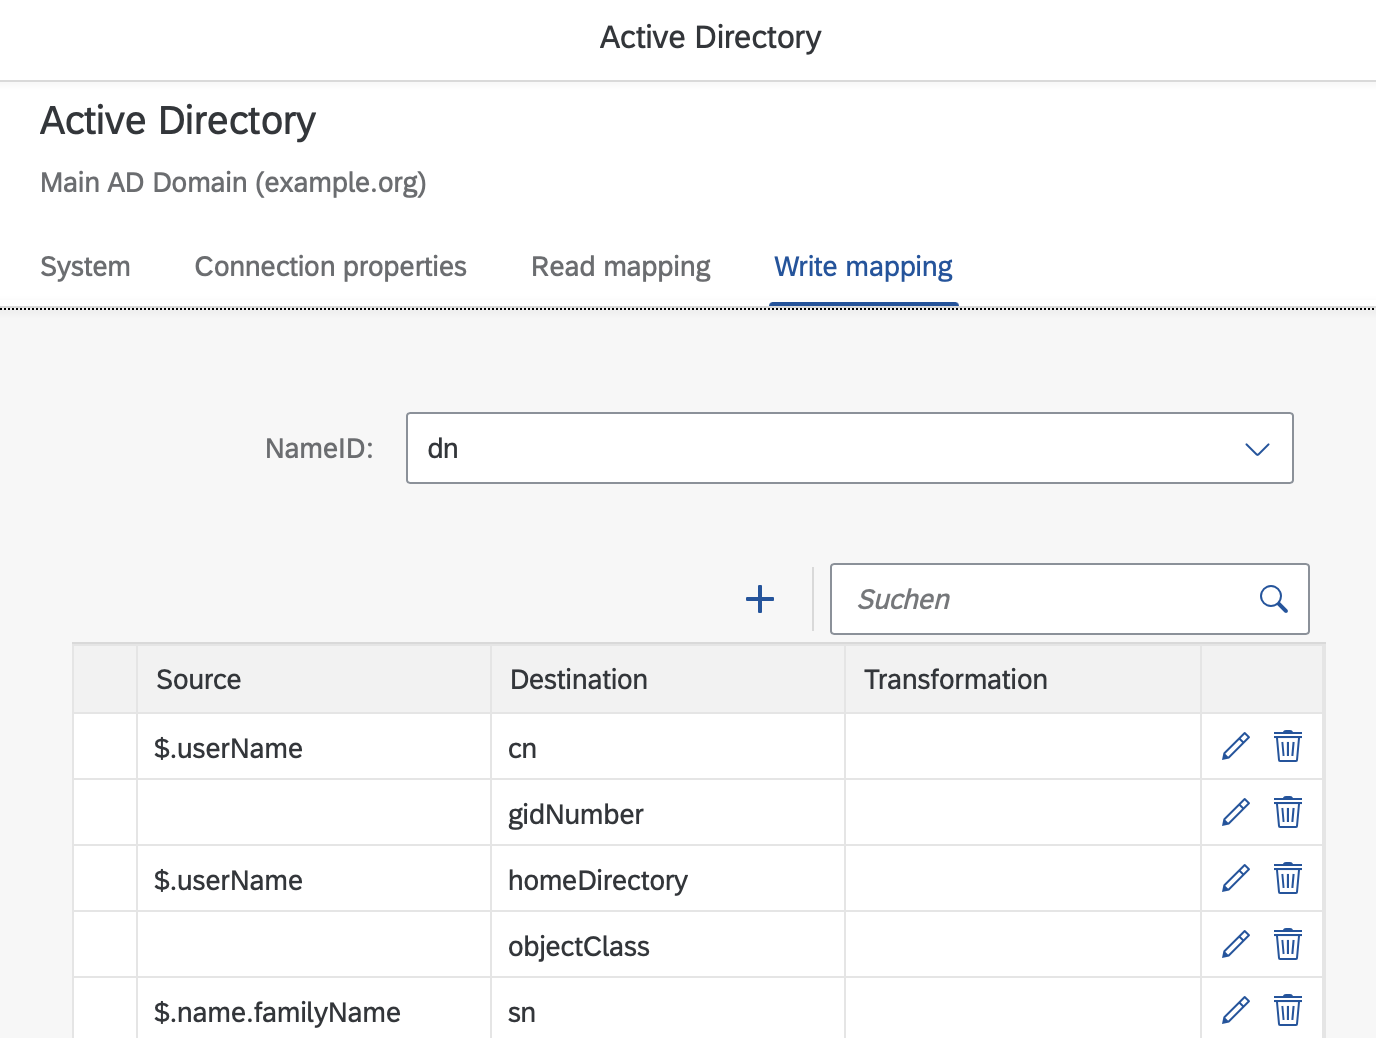
Open the target system overview and choose Write mappings:
-
Either create a new mapping (plus icon), edit an existing mapping (pencil icon) or delete one (bin icon).
-
On creation or on edit the following fields can be set:
- Source attribute is the SCIM attribute.
- Destination attribute is the target system attribute to whom the source attribute will be mapped into. Asena will provide you a set of attributes, but you can extend it depending on the functionality of the connector.
- Transformation script can be used to modify the source attribute before being mapped.
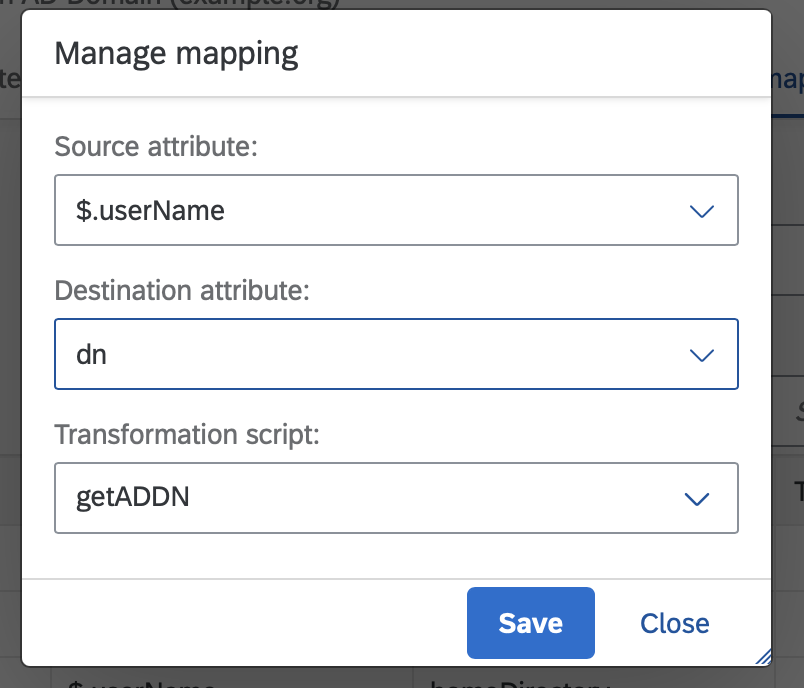
- Save.
To activate the SCIM Gateway to the target system, activate the system:
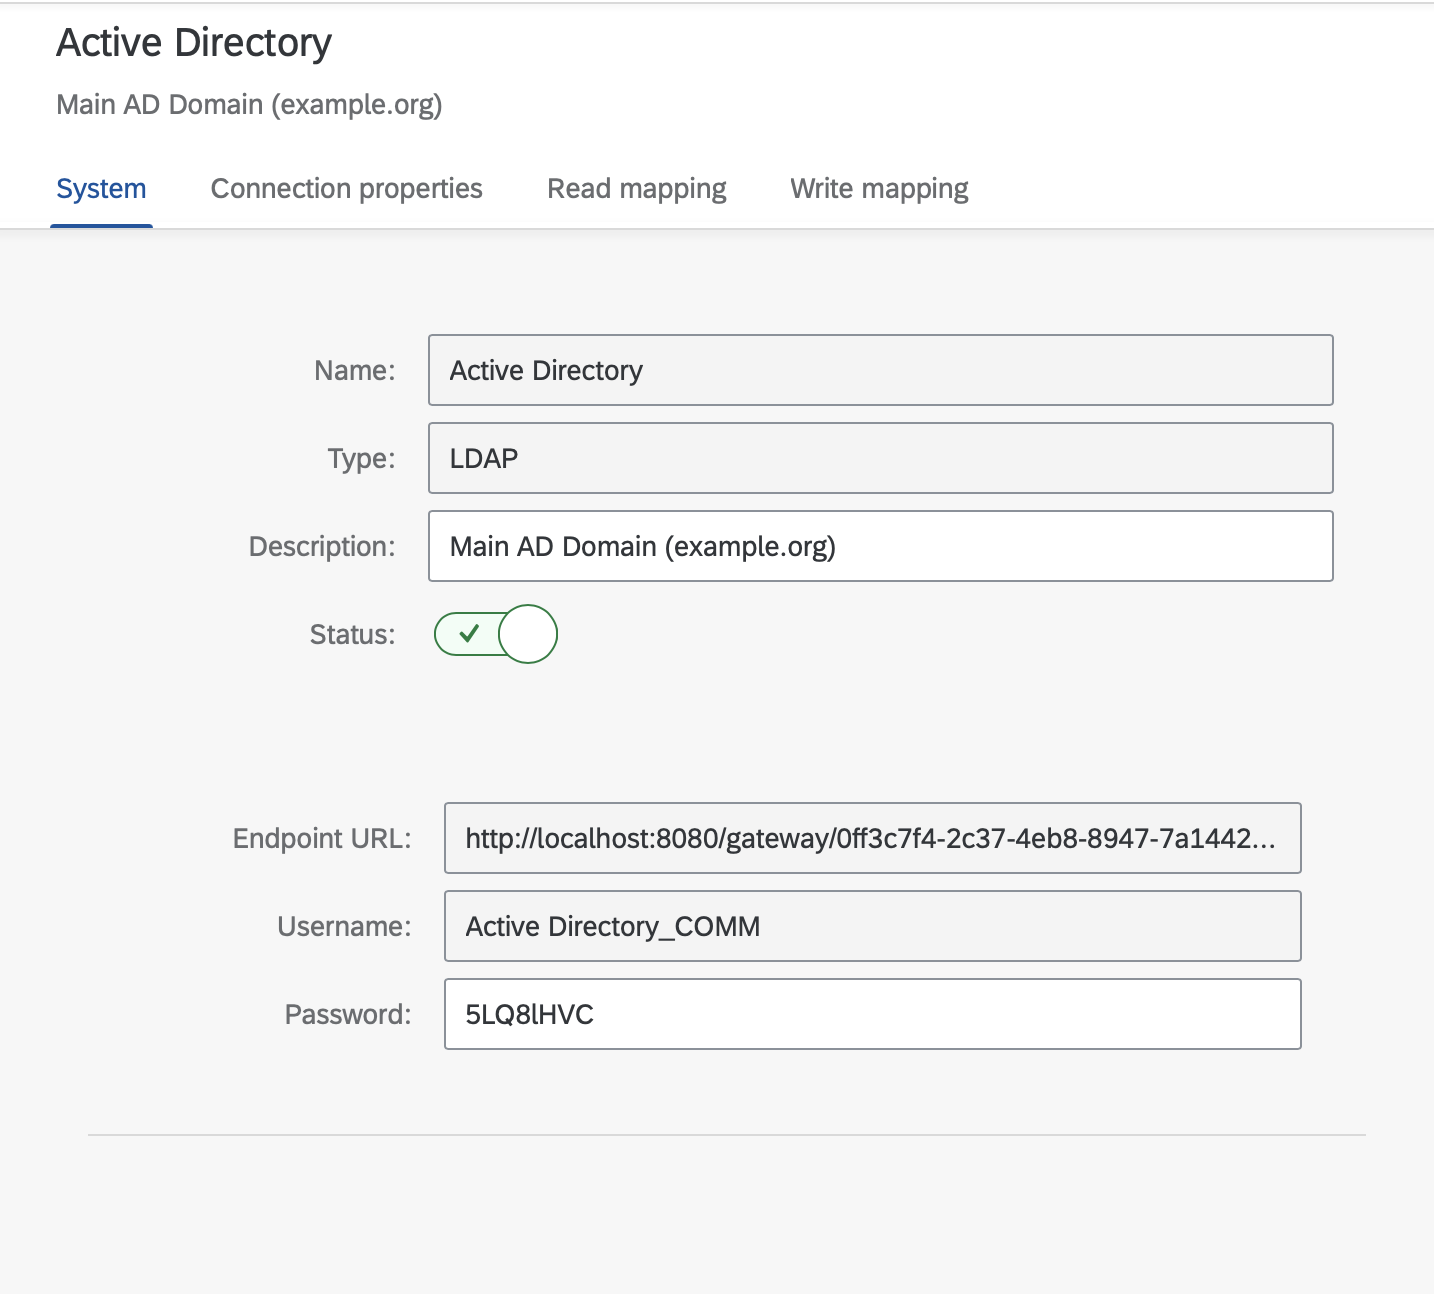
Asena will provide you a SCIM endpoint and the user details for accessing it with basic auth.
Deactivated target systems will always send back a 403 Forbidden on the endpoint!